Frontend
Zigbee2MQTT has a built-in web-based frontend.
To enable the frontend add the following to your configuration.yaml. This will start the frontend on port 8080.
frontend:
    enabled: true
Advanced configuration
frontend:
    enabled: true
    # Optional, default: zigbee2mqtt-frontend, possible: zigbee2mqtt-frontend, zigbee2mqtt-windfront
    package: zigbee2mqtt-frontend
    # Optional, default: 8080
    port: 8080
    # Optional, empty by default to listen on both IPv4 and IPv6. Opens a unix socket when given a path instead of an address (e.g. '/run/zigbee2mqtt/zigbee2mqtt.sock')
    # Don't set this if you use Docker or the Home Assistant add-on unless you're sure the chosen IP is available inside the container
    host: 0.0.0.0
    # Optional, enables authentication, disabled by default, cleartext (no hashing required)
    auth_token: your-secret-token
    # Optional, url on which the frontend can be reached, currently only used for the Home Assistant device configuration page
    url: 'https://zigbee2mqtt.myhouse.org'
    # Optional, certificate file path for exposing HTTPS. The sibling property 'ssl_key' must be set for HTTPS to be activated
    ssl_cert: /config/etc/letsencrypt/live/mydomain.com/fullchain.pem
    # Optional, private key file path for exposing HTTPS. The sibling property 'ssl_cert' must be set for HTTPS to be activated
    ssl_key: /config/etc/letsencrypt/live/mydomain.com/privkey.pem
    # Optional, base URL for the frontend, when served from a subpath, e.g. behind the proxy. Default value is '/'
    base_url: /zigbee2mqtt
    # Optional, list of regular expressions to hide notifications, the example below hides notifications for failed device pings
    notification_filter:
        - 'z2m: Failed to ping.*'
    # Optional, if true, the frontend UI is not served, only the WebSocket is maintained by
    # Zigbee2MQTT (you are required to serve a standalone UI yourself as needed).
    disable_ui_serving: false
To specify the auth_token in a different file set e.g. auth_token: '!secret.yaml auth_token', create a file called secret.yaml next to configuration.yaml with content auth_token: super-secret-token.
NOTE: If you are running Zigbee2MQTT via the Home Assistant addon you cannot change the port. The addon will force the frontend to run on port 8099 as Home Assistant Ingress requires this.
package setting details
You can change the package used for frontend (requires a restart of Zigbee2MQTT). This will change the web-based UI of Zigbee2MQTT accordingly.
IMPORTANT
The features, links and general design in each package will vary.
zigbee2mqtt-windfront
A remake of the original frontend with new code, new design, new features... 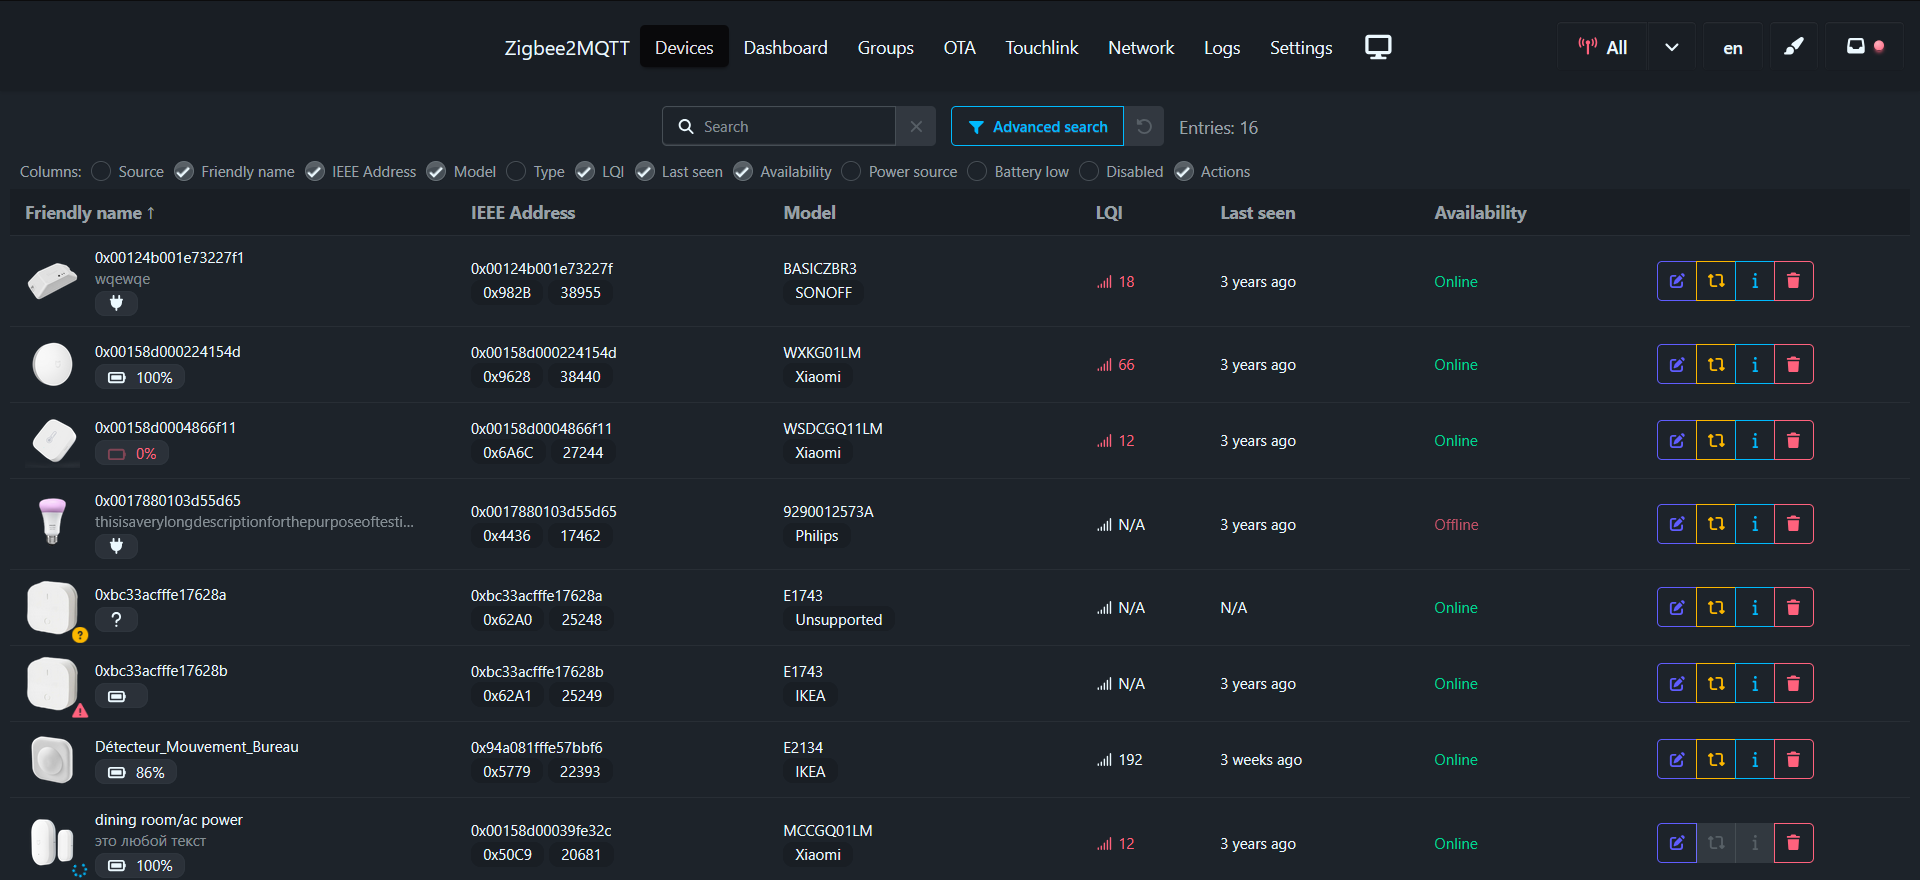 Details: https://github.com/Nerivec/zigbee2mqtt-windfront
Feedback can be provided in #28442.
Can also be used as standalone (with support for multiple Zigbee2MQTT instances), see: https://github.com/Nerivec/zigbee2mqtt-windfront/wiki#standalone-serving-with-multi-zigbee2mqtt-support
zigbee2mqtt-frontend
The original frontend (legacy). 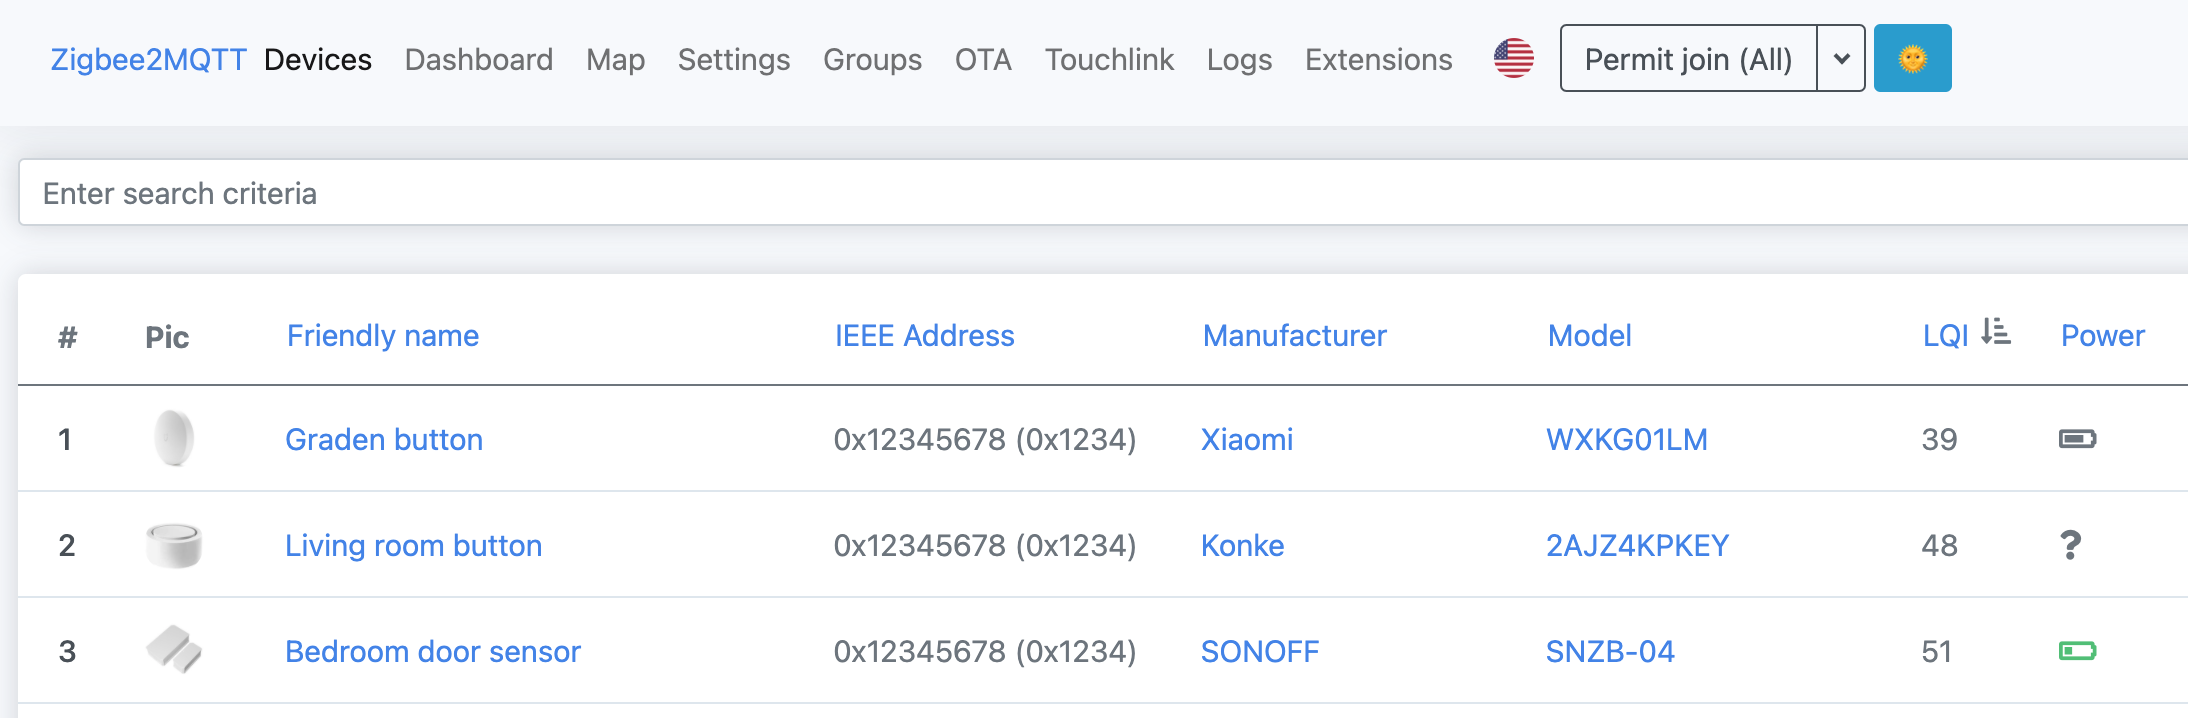 Details: https://github.com/nurikk/zigbee2mqtt-frontend
Nginx proxy configuration
In case you want to run the frontend behind a proxy you can use the following config as an example.
Due to WebKit Bug 80362, which prevents basic authentication from being used with WebSockets, the frontend will not work in WebKit-based browsers when this type of authentication is configured. This includes desktop Safari on Mac and all browsers and web views on iOS. To work around the issue, configure the frontend's auth_token to configure application-level auth and remove auth_basic from the web server config.
server {
    listen       80;
    server_name  zigbee2mqtt.mydomain.com;
    return 301   https://zigbee2mqtt.mydomain.com$request_uri;
}

server {
    listen      443 ssl http2;
    listen      [::]:443 ssl http2;

    # In case you want to use basic authentication:
    auth_basic "Login";
    auth_basic_user_file /zigbee2mqtt_htpasswd;

    ssl_certificate     /config/etc/letsencrypt/live/mydomain.com/fullchain.pem;
    ssl_certificate_key /config/etc/letsencrypt/live/mydomain.com/privkey.pem;

    server_name zigbee2mqtt.mydomain.com;

    location / {
        proxy_pass http://localhost:8080/;
        proxy_set_header Host $host;
        proxy_set_header X-Real-IP $remote_addr;
        proxy_set_header X-Forwarded-For $proxy_add_x_forwarded_for;
    }

    location /api {
        proxy_pass         http://localhost:8080/api;
        proxy_set_header Host $host;

        proxy_http_version 1.1;
        proxy_set_header Upgrade $http_upgrade;
        proxy_set_header Connection "upgrade";
    }
}
Apache2 proxy configuration
Credit: Florian Metzger-Noel
Enable these modules using a2enmod proxy proxy_wstunnel proxy_http rewrite
<VirtualHost *:80>
   ServerName example.com
   ServerAdmin info@example.com


    ProxyRequests off
    ProxyVia on
    RewriteEngine On

    RewriteEngine On
    RewriteCond %{HTTP:Connection} Upgrade [NC]
    RewriteCond %{HTTP:Upgrade} websocket [NC]
    RewriteRule /(.*) ws://localhost:8080/$1 [P,L]

    ProxyPass               / http://localhost:8080/
    ProxyPassReverse        / http://localhost:8080/


   <Proxy *>
   Order deny,allow
   Allow from all
   </Proxy>

   ErrorLog ${APACHE_LOG_DIR}/company2-error.log
   CustomLog ${APACHE_LOG_DIR}/company2-access.log combined

</VirtualHost>
Advanced: changing frontend port
The default Dockerfile uses EXPOSE 8080. While this cannot be changed at runtime, it mainly serves as a documentation hint.
To run the frontend on a different port (e.g., 9090), you must first update the port in your configuration.yaml and then publish the new port when running the container.
Method 1: Direct Port Publishing
This is the simplest approach.
In your
configuration.yaml, set the port:frontend: port: 9090Run the container, publishing the new port and mounting your data directory:
docker run \
  -p 9090:9090 \
  -v ./data:/app/data \
  koenkk/zigbee2mqtt
Method 2: Using a Reverse Proxy (e.g., Traefik)
If you use a reverse proxy, you don't need to publish the port directly. Instead, use labels to tell the proxy which port the service is running on internally.
Set the port in
configuration.yaml(as shown in Method 1).Run the container with Traefik labels:
docker run \
  -v ./data:/app/data \
  -l "traefik.enable=true" \
  -l "traefik.http.services.zigbee2mqtt.loadbalancer.server.port=9090" \
  koenkk/zigbee2mqtt