Zigbee2MQTTZigbee2MQTT
  • Getting started
  • Supported Adapters
  • Supported Devices
  • Installation
  • Configuration
  • Usage
  • FAQ
Devices
  • Zigbee

    • Zigbee network
    • Improve network range and stability
    • Secure your Zigbee network
    • Sniff Zigbee traffic
    • Create a CC2530 router
  • Support new devices

    • Support new devices
    • Support new Tuya devices
    • Find Tuya Data Points
  • Remote Adapter

    • Connect to a remote adapter
    • Connect to a remote Sonoff ZBBridge
  • More

    • 3D cases
    • External converters
    • External extensions
    • Switch to the dev branch
    • Get Tuya and Xiaomi OTA url
  • Forum
  • Discord
  • Issues
  • Donate
GitHub
GitHub (docs)
  • Getting started
  • Supported Hardware
    • Adapters
    • Devices
  • Installation
    • Linux
    • Docker
    • Home Assistant addon
    • openHABian
    • Windows
    • FreeBSD jail
    • Kubernetes
    • Watchdog
    • Zigbee2MQTT fails to start/crashes runtime
  • Configuration
    • Adapter settings
    • MQTT
    • Zigbee network
    • Frontend
    • Devices and Groups
    • Logging
    • Device blocklist / passlist
    • OTA device firmware update
    • Device Availability
    • Home Assistant integration
    • More configuration options
    • Configuration update
  • Usage
    • Allowing devices to join
    • Integrations
    • Touchlink
    • Scenes
    • Binding
    • Groups
    • OTA updates
    • MQTT Topics and Messages
    • Exposes
  • FAQ

Flashing via UNIFLASH

UNIFLASH can be used to flash certain Texas Instruments MCUs (e.g. CC26X2R1 and CC1352P-2). It runs on Windows, macOS and Linux.

n.b. UNIFLASH sometimes needs to update the programmer firmware, and this can fail if the device is connected to a USB 3 port. If this occurs, switch to a USB 2 port.

Note for flashing on Linux: Uniflash does not work well on some distributions. specifically, Fedora 31 may have some issue. Combinations that are verified to be working are:

  • Ubuntu 18.4 (LTS):
    • fresh install
    • # sudo apt install libgconf-2-4
    • # sudo apt install libusb-0.1-4
    • ... then follow the instructions below

Instructions

  1. Download and install UNIFLASH: download link
  2. Plug your device
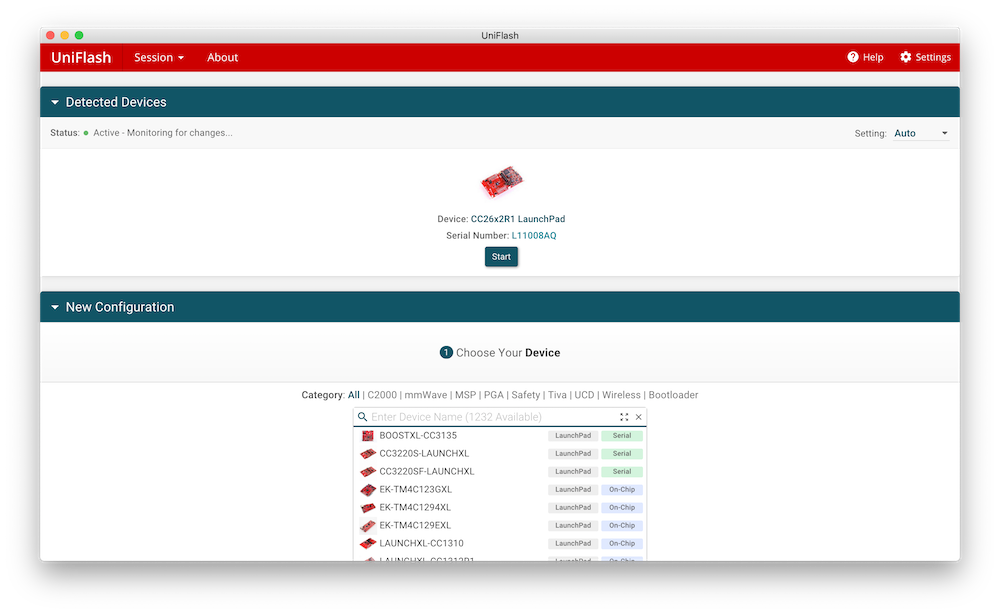
  3. Start UNIFLASH, your device will automatically be detected, press StartStart
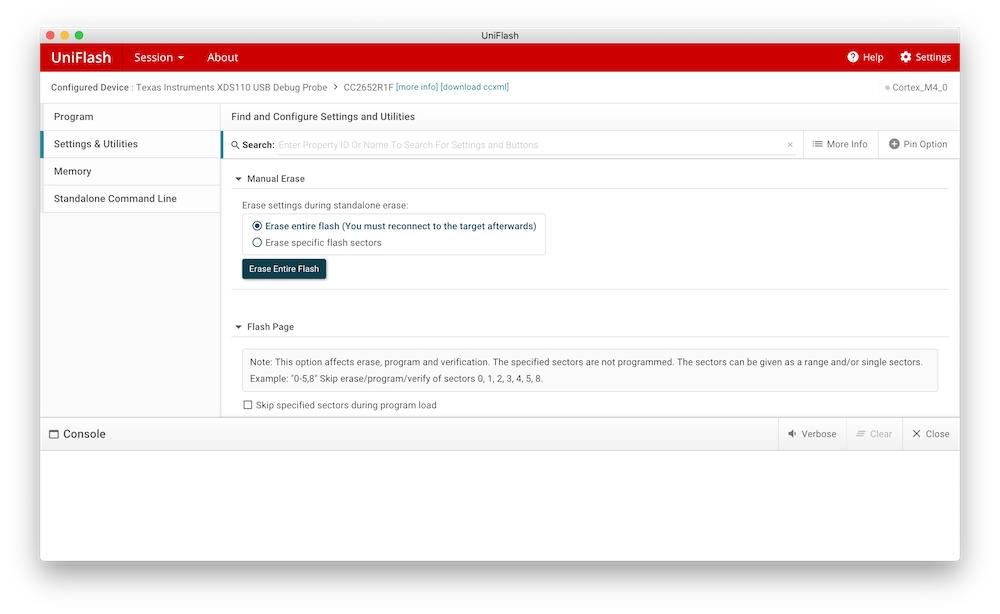
  4. Go to Settings & Utilities -> Manual Erase and press Erase Entire FlashErase
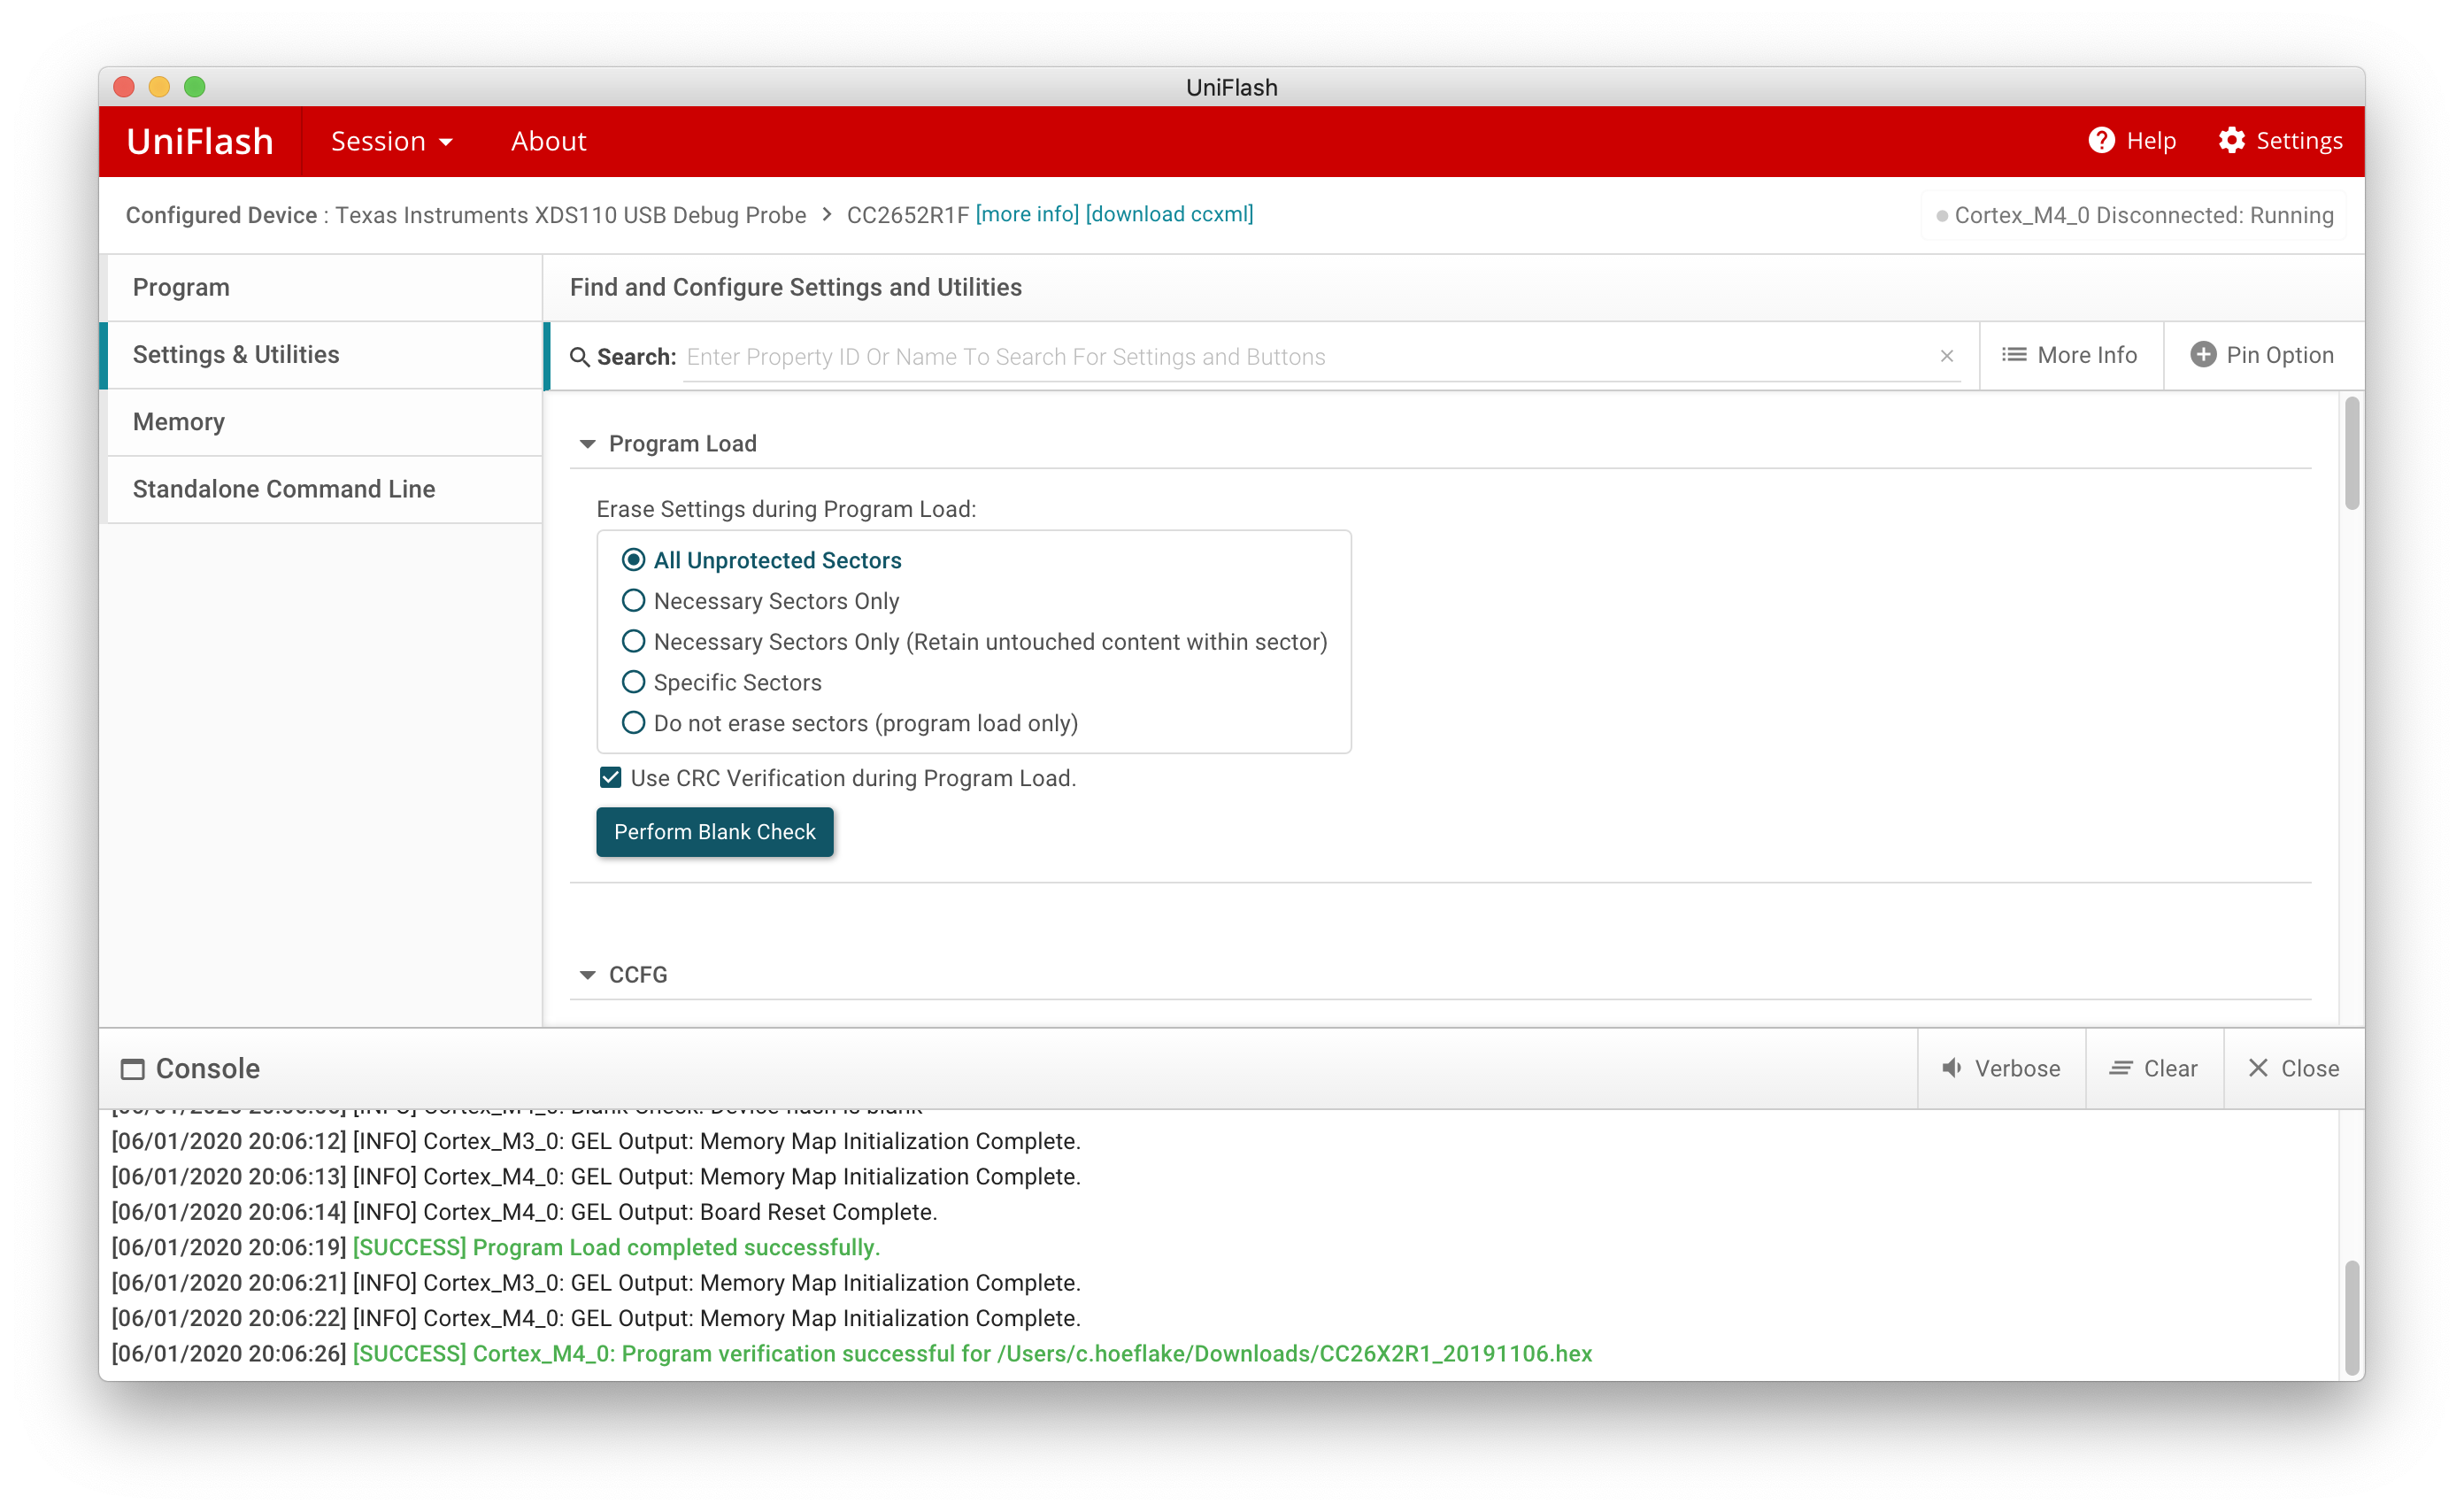
  5. Go to Settings & Utilities -> Program Load and select All Unprotected Sectors, click Perform Blank CheckLoad
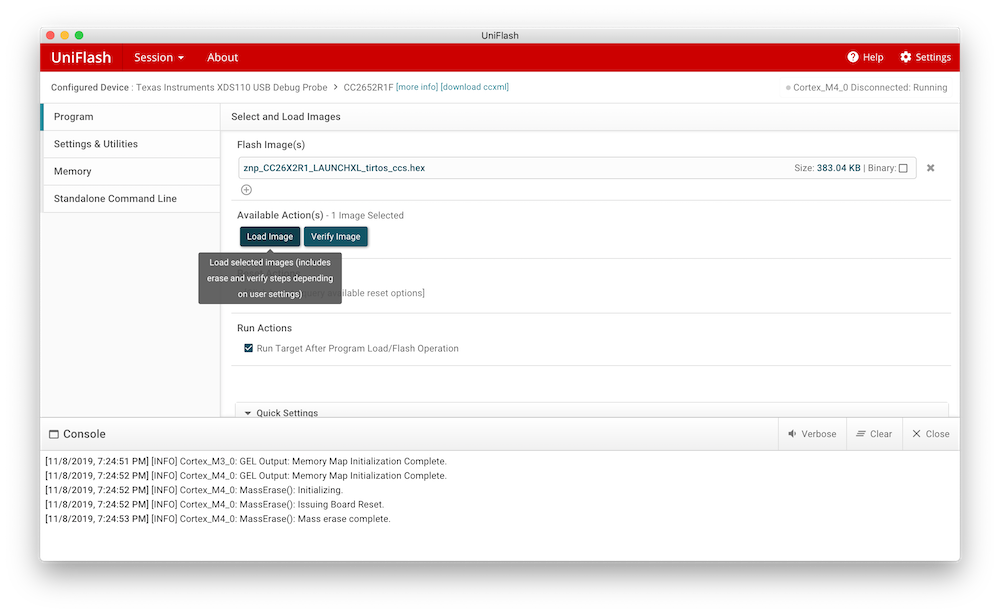
  6. Go to Program -> Flash Image(s), press Browse to select the firmware. Ensure that the path and file name do not contain any spaces (otherwise flashing may fail with "Error! Unable to open file ...").
  7. Now click Load image to upload the firmware Load
  8. Done!
Help to make the docu better and edit this page on Github ✌
Last Updated:: 6/13/25, 6:01 PM