Home Assistant
MQTT discovery
The easiest way to integrate Zigbee2MQTT with Home Assistant is by using MQTT discovery. This allows Zigbee2MQTT to automatically add devices to Home Assistant.
To achieve the best possible integration (including MQTT discovery):
In your Zigbee2MQTT
configuration.yamlset:homeassistant: enabled: trueEnable the MQTT integration in Home Assistant
Device/group page
Since Home Assistant 2021.11 the device/group page in Home Assistant can directly link to the frontend (Visit device button). To enable this set the url in the frontend configuration.
Home Assistant device registry
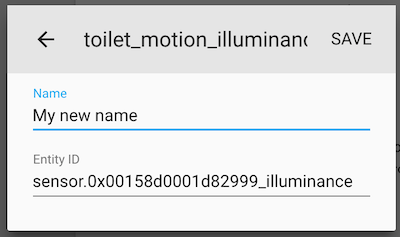
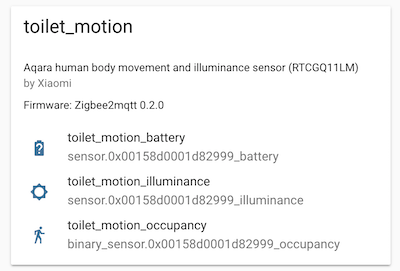
When using Home Assistant MQTT discovery, Zigbee2MQTT integrates with the Home Assistant device registry. This allows you to change the Home Assistant entity_id and friendly_name from the Home Assistant web interface without having to restart Home Assistant. It also makes it possible to show which entities belong to which device.
Customizing discovery
The device specific configuration allows you to modify the discovery payload. Here you can also prevent a device from being discovered. See Device specific configuration for the available options.
Responding to button actions
To respond to button actions you can use one of the following Home Assistant configurations.
Via MQTT device trigger (recommended)
The MQTT device triggers are discovered by Zigbee2MQTT once the event is triggered on the device at least once.
automation:
    - alias: Respond to button click
      triggers:
          - trigger: device
            domain: mqtt
            device_id: ad44cabee4c646f493814306aa6446e1
            type: action
            subtype: arrow_left_click
      actions:
          - action: light.toggle
            target:
                entity_id: light.bedroom
Via Home Assistant event entity (experimental)
Note: event entity is experimental and may break in the future.
This method work by responding to the state change of an event entity. The specific event can be targeted via the event_type attribute. Until the implementation becomes finalized, the event types and additional attributes are subject to change and you have to enable event entities explicitly by setting homeassistant: {experimental_event_entities: true} (see Configuration for more info).
automation:
    - alias: Respond to button click
      triggers:
          - trigger: state
            entity_id: event.my_switch_click
            to: ~
      conditions:
          - condition: template
            value_template: "{{trigger.from_state.state != 'unavailable'}}"
          - condition: template
            value_template: "{{trigger.to_state.attributes.event_type == 'single'}}"
      actions:
          - action: light.toggle
            target:
                entity_id: light.bedroom
Via Home Assistant action sensor (deprecated)
This method works by responding to the state change event of a sensor. For this homeassistant.legacy_action_sensor: true needs to be set in your configuration.yaml. See the docs for more info.
Warning
Note that this feature is deprecated and will be removed in the future. It's recommended to use the MQTT device trigger instead.
automation:
    - alias: Respond to button action
      trigger:
          platform: state
          entity_id: sensor.my_switch_action
          to: 'single'
      action:
          entity_id: light.my_bulb_light
          service: light.toggle
Groups
Groups discovery is supported for groups of lights, switches, locks and covers. For other types you have to manually create a config in the Home Assistant configuration.yaml. Group discovery properties can be overridden via groups.<id>.homeassistant in the Zigbee2MQTT configuration.
Overriding discovery properties
Any Home Assistant MQTT discovery property can be overridden on a device. Two examples are shown below. For a full and current list of discovery properties, see the Home Assistant MQTT Discovery integration and the Home Assistant extension in the Zigbee2MQTT source code.
Changing supported_color_modes
This is useful for switching light bulbs from reporting values from X/Y (which is the default) to reporting in hue / saturation (which is what bulbs report color in when changing via hue or saturation, such as with the hue_move and saturation_move commands).
This example changes a light's supported_color_modes discovery property to hue / saturation and color temperature:
devices:
    '0x12345678':
        friendly_name: my_light
        homeassistant:
            light:
                supported_color_modes: ['hs', 'color_temp']
Exposing switch as a light
If your device is currently discovered as a switch and you want to discover it as a light, the following config in the Zigbee2MQTT configuration.yaml can be used:
devices:
    '0x12345678':
        friendly_name: my_switch
        homeassistant:
            switch:
                type: light
                object_id: light
            light:
                name: null
                value_template: null
                state_value_template: '{{ value_json.state }}'
            # OR if your devices has multiple endpoints (e.g. left/right)
            switch_left:
                type: light
                object_id: light_left
            light_left:
                name: my_switch_left
                value_template: null
                state_value_template: '{{ value_json.state_left }}'
            switch_right:
                type: light
                object_id: light_right
            light_right:
                name: my_switch_right
                value_template: null
                state_value_template: '{{ value_json.state_right }}'
Changing device properties
As an advanced example to show changing any MQTT property can be overridden, the following configuration changes the suggested_area property of the device. The example shows that you can just copy the given MQTT discovery hierarchy underneath the homeassistant property (given that suggested_area is underneath the device property). Please note, that other device properties are possibly set by Zigbee2MQTT (e.g. manufacturer).
This example changes the light's device's suggested area discovery property to "Living Room":
devices:
    '0x12345678':
        friendly_name: my_light
        homeassistant:
            device:
                suggested_area: 'Living Room'
Using a custom name for the device and entities
In order to get a more readable name for the device and entities in Home Assistant, a specific name for Home Assistant can be set in the device configuration. If set, this name will be used instead of friendly_name.
devices:
    '0x12345678':
        friendly_name: living_room/temperature_sensor
        homeassistant:
            name: Living Room Temperature Sensor
Controlling Zigbee2MQTT via Home Assistant
The following Home Assistant configuration allows you to control Zigbee2MQTT from Home Assistant.
You can add it to the appropriate section of your configuration.yaml, or you can add it as a Home Assistant Package by adding the following to zigbee2mqtt.yaml in your packages folder.
# Input number for joining time remaining (in minutes)
input_number:
    zigbee2mqtt_join_minutes:
        name: 'Zigbee2MQTT join minutes'
        initial: 2
        min: 1
        max: 5
        step: 1
        mode: slider

# Input text to input Zigbee2MQTT friendly_name for scripts
input_text:
    zigbee2mqtt_new_name:
        name: Zigbee2MQTT New Name
        initial: ''
        icon: 'mdi:moon-new'

# Input select for choosing Zigbee2MQTT devices
input_select:
    zigbee2mqtt_old_name_select:
        name: Zigbee2MQTT Old Name
        icon: 'mdi:moon-full'
        options:
            - Initial Option
    zigbee2mqtt_remove_select:
        name: Zigbee2MQTT Remove
        icon: 'mdi:trash-can'
        options:
            - Initial Option

# Input boolean to set the force remove flag for devices
input_boolean:
    zigbee2mqtt_force_remove:
        name: Zigbee2MQTT Force Remove
        initial: false
        icon: mdi:alert-remove

# Scripts for renaming & removing devices
script:
    zigbee2mqtt_rename:
        alias: Zigbee2MQTT Rename
        icon: 'mdi:pencil'
        sequence:
            - action: mqtt.publish
              data:
                  topic: zigbee2mqtt/bridge/request/device/rename
                  payload: >-
                      {
                        "from": "{{ states('input_select.zigbee2mqtt_old_name_select') }}",
                        "to": "{{ states('input_text.zigbee2mqtt_new_name') }}"
                      }
    zigbee2mqtt_remove:
        alias: Zigbee2MQTT Remove
        icon: 'mdi:trash-can'
        sequence:
            - action: mqtt.publish
              data:
                  topic: zigbee2mqtt/bridge/request/device/remove
                  payload: >-
                      {
                        "id": "{{ states('input_select.zigbee2mqtt_remove_select') }}",
                        "force": {{ 'true' if is_state('input_boolean.zigbee2mqtt_force_remove', 'on') else 'false' }}
                      }

automation:
    - id: 'zigbee2mqtt_create_notification_on_successful_interview'
      alias: Zigbee Device Joined Notification
      trigger:
          platform: mqtt
          topic: 'zigbee2mqtt/bridge/event'
      condition:
          condition: template
          value_template: '{{trigger.payload_json.type == "device_interview" and trigger.payload_json.data.status == "successful" and trigger.payload_json.data.supported}}'
      action:
          - service: persistent_notification.create
            data_template:
                title: Device joined the Zigbee2MQTT network
                message: 'Name: {{trigger.payload_json.data.friendly_name}},
                    Vendor: {{trigger.payload_json.data.definition.vendor}},
                    Model: {{trigger.payload_json.data.definition.model}},
                    Description: {{trigger.payload_json.data.definition.description}}'

    - id: 'zigbee2mqtt_update_devices_list'
      alias: Update Zigbee Devices List
      description: ''
      trigger:
          - platform: mqtt
            topic: zigbee2mqtt/bridge/event
          - platform: mqtt
            topic: zigbee2mqtt/bridge/response/device/rename
          - platform: homeassistant
            event: start
      condition: []
      action:
          - delay:
                hours: 0
                minutes: 0
                seconds: 1
                milliseconds: 0
          - service: input_select.set_options
            metadata: {}
            data:
                options: |
                    {%- set find_integration = 'mqtt' %}
                     {%- set devices = states | map(attribute='entity_id') | map('device_id') | unique | reject('eq',None) | list %}
                     {%- set ns = namespace(entities = []) %}
                     {%- for device in devices if device_attr(device, 'identifiers') %}
                       {%- set ids = device_attr(device, 'identifiers') | list | first %}
                       {%- if ids and ids | length == 2 and ids[0] == find_integration and "zigbee2mqtt" in ids[1] %}
                         {% set names = device_attr(device, 'name').split('\n') | list %}
                         {%- set ns.entities = ns.entities + names %}
                       {%- endif %}
                     {%- endfor %}
                     {{ ns.entities | unique | sort | list}}
            target:
                entity_id:
                    - input_select.zigbee2mqtt_old_name_select
                    - input_select.zigbee2mqtt_remove_select
          - service: input_text.set_value
            metadata: {}
            data:
                value: ''
            target:
                entity_id: input_text.zigbee2mqtt_new_name
      mode: single
The following is an example lovelace card configuration.
title: Zigbee2MQTT
type: entities
show_header_toggle: false
entities:
    - entity: binary_sensor.zigbee2mqtt_bridge_connection_state
    - entity: sensor.zigbee2mqtt_bridge_version
    - entity: sensor.zigbee2mqtt_bridge_coordinator_version
    - type: divider
    - entity: switch.zigbee2mqtt_bridge_permit_join
    - entity: input_number.zigbee2mqtt_join_minutes
    - type: divider
    - entity: input_select.zigbee2mqtt_old_name_select
    - entity: input_text.zigbee2mqtt_new_name
    - entity: script.zigbee2mqtt_rename
    - type: divider
    - entity: input_select.zigbee2mqtt_remove_select
    - entity: input_boolean.zigbee2mqtt_force_remove
    - entity: script.zigbee2mqtt_remove