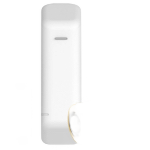
Leedarson LDHD2AZW
| Model | LDHD2AZW |
| Vendor | Leedarson |
| Description | Magnetic door & window contact sensor |
| Exposes | contact, battery_low, tamper, temperature, battery |
| Picture |  |
Notes
Pairing
- Slide the top cover open to expose the battery pull tab, pull the plastic tab to activate the sensor, slide the top cover to the closed position
- The LED indicator will be lit green for two seconds while the device is booting.
- Once booted the LED will blink green three times every 5 seconds while scanning for a network.
- If network is not found after 10 minutes, the sensor will go into sleep mode. To restart the pairing process, tamper the sensor by sliding the battery cover open and then closed or create a zone event by placing the magnet near the sensor and then move it more than 3” away from the sensor.
- Once the device has successfully paired to the home controller or security system it is ready for installation, follow the steps in the installation section.
Operation
- The LED on the sensor will remain off during the normal operation.
- The sensor is equipped with a tamper switch. Sliding the battery cover to the open position will cause a trouble fault on the home controller or security system. Sliding the cover open will also activate the communication test for 30 seconds. Once battery cover is closed the trouble will clear.
Reset to Factory Defaults & Reboot
If the sensor needs to be factory defaulted:
- Enter the home controller or security system and use the device menus to delete the sensor that requires a factory reset.
- Slide the battery cover to expose the battery and the reset release button.
- Depress the small reset release button while continuing to the slide the battery cover until you expose the red reset text. You may need to use a small screwdriver or paper clip to press the release
- Remove the battery, wait 10 seconds and then re-insert the battery.
- Once the battery is installed slide the battery cover such that the reset button is no longer exposed but such that the cover is not completely closed. (Note: You must perform this operation within 4 seconds of installing the battery.)
- The factory reset process will take approximately 1 minute, during this time the LED will remain solid green, if the LED does not remain solid green this mean you did not release the reset in less than 4 seconds and must repeat steps 1 thru 4.
- Upon completion of the factory reset the LED will blink green three times every 5 seconds indicating it’s ready to be paired.
Troubleshooting
If device has trouble with pairing to the home controller or security system try the following steps:
- Open, then close the battery cover to trigger a tamper and re-start the pairing process.
- If device continues to have trouble pairing, remove the battery for 10 seconds and then re-insert it.
- If device continues to have trouble pairing, use “Reset to Factory Defaults” procedure to attempt pairing again.
If the device was communicating with the home controller or security system but is no longer communicating, try the following steps:
- If the device has been in use for months or years and the failure is sudden, check the controller to see if the device has a low battery. Follow the instructions provided for replacing the battery.
- Perform a Factory Reset and then Re-pair the sensor as indicated in the steps above.
- Trigger a tamper by opening and closing the battery cover, if the LED is blinking RED it’s an indication that your sensor can no longer communicate with the home controller or security system due to changes in your RF environment. Install a repeater so the system’s range can reach the desired location for the sensor.
Options
How to use device type specific configuration
temperature_calibration: Calibrates the temperature value (absolute offset), takes into effect on next report of device. The value must be a number.temperature_precision: Number of digits after decimal point for temperature, takes into effect on next report of device. This option can only decrease the precision, not increase it. The value must be a number with a minimum value of0and with a maximum value of3
Exposes
Contact (binary)
Indicates if the contact is closed (= true) or open (= false). Value can be found in the published state on the contact property. It's not possible to read (/get) or write (/set) this value. If value equals false contact is ON, if true OFF.
Battery low (binary)
Indicates if the battery of this device is almost empty. Value can be found in the published state on the battery_low property. It's not possible to read (/get) or write (/set) this value. If value equals true battery low is ON, if false OFF.
Tamper (binary)
Indicates whether the device is tampered. Value can be found in the published state on the tamper property. It's not possible to read (/get) or write (/set) this value. If value equals true tamper is ON, if false OFF.
Temperature (numeric)
Measured temperature value. Value can be found in the published state on the temperature property. It's not possible to read (/get) or write (/set) this value. The unit of this value is °C.
Battery (numeric)
Remaining battery in %, can take up to 24 hours before reported. Value can be found in the published state on the battery property. It's not possible to read (/get) or write (/set) this value. The minimal value is 0 and the maximum value is 100. The unit of this value is %.
