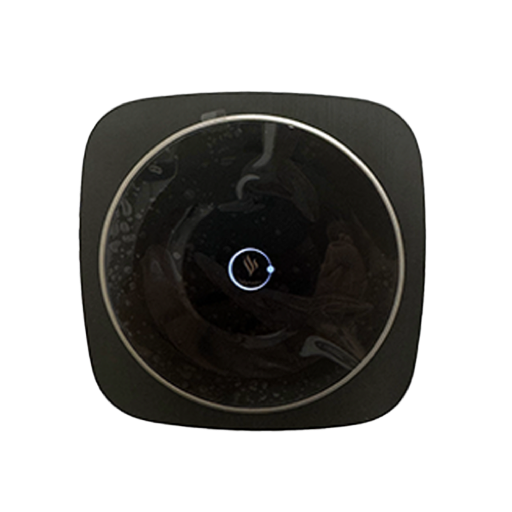
VSmart HS-SW100ZB-VNM
| Model | HS-SW100ZB-VNM |
| Vendor | VSmart |
| Description | Wall switch 1 gang |
| Exposes | switch (state), led_indicator_color_on, led_indicator_color_off, vibration_intensity, time_periods, morning_led_intensity, evening_led_intensity, night_led_intensity, led_brightness_levels |
| Picture |  |
Notes
Pairing
Put the device in pairing mode by pressing and holding the button on the device for 5 seconds until the LED indicator flashes rapidly.
Reset
To reset the device, press and hold the button for 10 seconds until the LED indicator flashes 3 times.
Installation
- Turn off power at the circuit breaker before installation
- Remove existing switch and connect wires according to the wiring diagram
- Ensure proper grounding
- Maximum load: 10A resistive, 6A inductive
LED Indicator Features
- led_indicator_color_on: Set LED color when switch is ON (hex format: #RRGGBB, e.g., #ff0000 for red)
- led_indicator_color_off: Set LED color when switch is OFF (hex format: #RRGGBB, e.g., #ffffff for white)
- morning_led_intensity: LED intensity for morning period (0-100%)
- evening_led_intensity: LED intensity for evening period (0-100%)
- night_led_intensity: LED intensity for night period (0-100%)
- led_brightness_levels: Configure low/medium/high brightness levels
Vibration Feedback
- vibration_intensity: Button vibration intensity (0-100%)
- Provides tactile feedback when button is pressed
Time Period Settings
- time_periods: Configure morning, evening, and night periods
- morning_start_hour: Morning period start hour (0-23)
- evening_start_hour: Evening period start hour (0-23)
- night_start_hour: Night period start hour (0-23)
- Morning must start before evening, evening must start before night
- LED behavior changes based on time periods
LED Brightness Levels
- led_brightness_levels: Configure brightness levels for different intensity settings
- low_brightness_percent: Low brightness level percentage (0-100%)
- medium_brightness_percent: Medium brightness level percentage (0-100%)
- high_brightness_percent: High brightness level percentage (0-100%)
- Low must be lower than medium, Medium must be lower than high
Options
How to use device type specific configuration
state_action: State actions will also be published as 'action' when true (default false). The value must betrueorfalse
Exposes
Switch
The current state of this switch is in the published state under the state property (value is ON or OFF). To control this switch publish a message to topic zigbee2mqtt/FRIENDLY_NAME/set with payload {"state": "ON"}, {"state": "OFF"} or {"state": "TOGGLE"}. To read the current state of this switch publish a message to topic zigbee2mqtt/FRIENDLY_NAME/get with payload {"state": ""}.
On with timed off
When setting the state to ON, it might be possible to specify an automatic shutoff after a certain amount of time. To do this add an additional property on_time to the payload which is the time in seconds the state should remain on. Additionally an off_wait_time property can be added to the payload to specify the cooldown time in seconds when the switch will not answer to other on with timed off commands. Support depends on the switch firmware. Some devices might require both on_time and off_wait_time to work Examples : {"state" : "ON", "on_time": 300}, {"state" : "ON", "on_time": 300, "off_wait_time": 120}.
Led indicator color on (text)
LED indicator color when switch is ON (hex format: #RRGGBB, e.g., #ff0000 for red). Value will not be published in the state. It's not possible to read (/get) this value. To write (/set) a value publish a message to topic zigbee2mqtt/FRIENDLY_NAME/set with payload {"led_indicator_color_on": NEW_VALUE}.
Led indicator color off (text)
LED indicator color when switch is OFF (hex format: #RRGGBB, e.g., #ffffff for white). Value will not be published in the state. It's not possible to read (/get) this value. To write (/set) a value publish a message to topic zigbee2mqtt/FRIENDLY_NAME/set with payload {"led_indicator_color_off": NEW_VALUE}.
Vibration intensity (numeric)
Button vibration intensity (0-100%). Value will not be published in the state. It's not possible to read (/get) this value. To write (/set) a value publish a message to topic zigbee2mqtt/FRIENDLY_NAME/set with payload {"vibration_intensity": NEW_VALUE}. The minimal value is 0 and the maximum value is 100. The unit of this value is %.
Time periods (composite)
Time period settings for switch behavior. Morning must start before evening, evening must start before night.. Can be set by publishing to zigbee2mqtt/FRIENDLY_NAME/set with payload {"time_periods": {"morning_start_hour": VALUE, "evening_start_hour": VALUE, "night_start_hour": VALUE}}
morning_start_hour(numeric): Morning period start hour (0-23) max value is 23, unit is hevening_start_hour(numeric): Evening period start hour (0-23) max value is 23, unit is hnight_start_hour(numeric): Night period start hour (0-23) max value is 23, unit is h
Morning led intensity (numeric)
LED intensity for morning period (0-100%). Value will not be published in the state. It's not possible to read (/get) this value. To write (/set) a value publish a message to topic zigbee2mqtt/FRIENDLY_NAME/set with payload {"morning_led_intensity": NEW_VALUE}. The minimal value is 0 and the maximum value is 100. The unit of this value is %.
Evening led intensity (numeric)
LED intensity for evening period (0-100%). Value will not be published in the state. It's not possible to read (/get) this value. To write (/set) a value publish a message to topic zigbee2mqtt/FRIENDLY_NAME/set with payload {"evening_led_intensity": NEW_VALUE}. The minimal value is 0 and the maximum value is 100. The unit of this value is %.
Night led intensity (numeric)
LED intensity for night period (0-100%). Value will not be published in the state. It's not possible to read (/get) this value. To write (/set) a value publish a message to topic zigbee2mqtt/FRIENDLY_NAME/set with payload {"night_led_intensity": NEW_VALUE}. The minimal value is 0 and the maximum value is 100. The unit of this value is %.
Led brightness levels (composite)
LED brightness levels for different intensity settings. Low must be lower than medium, Medium must be lower than high.. Can be set by publishing to zigbee2mqtt/FRIENDLY_NAME/set with payload {"led_brightness_levels": {"low_brightness_percent": VALUE, "medium_brightness_percent": VALUE, "high_brightness_percent": VALUE}}
low_brightness_percent(numeric): Low brightness level percentage (0-100%) max value is 100, unit is %medium_brightness_percent(numeric): Medium brightness level percentage (0-100%) max value is 100, unit is %high_brightness_percent(numeric): High brightness level percentage (0-100%) max value is 100, unit is %
