MiBoxer FUT089Z
| Model | FUT089Z |
| Vendor | MiBoxer |
| Description | RGB+CCT Remote |
| Exposes | battery, voltage, action |
| Picture | 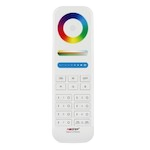 |
Notes
Pairing
To pair the device:
- Permit joining in Zigbee2MQTT
- Press and hold the Master ON and OFF buttons simultaneously until the central red LED begins flashing rapidly
Device Behavior
The remote reports three sensor values by default:
Battery(%)Voltage(mV)Linkquality(lqi)
The remote features seven numbered pairs of on/off buttons, with each pair controlling a distinct zone. Additionally, there is an eighth button group at the top, comprising dedicated ON and OFF buttons for zone 8. Each zone corresponds to a specific Zigbee group. By default, Zone 1 maps to Zigbee group 101, Zone 2 to 102, and so on. Note that when using multiple MiBoxer FUT089Z remotes, they will all control the same Zigbee groups (101-108) by default.
On each button press or slider touch, the device sends one or two consecutive actions and a corresponding group ID. The group ID is published along with the device state as action_group:
| Button / Slider | Action | Group ID |
|---|---|---|
Button 1-7 I | on | 101 - 107 |
Button 1-7 O | off | 101 - 107 |
R, G, B | move_to_hue_and_saturation, followed by brightness_move_to_level | Group ID of the last on/off button that was pressed |
W | color_temperature_move, followed by brightness_move_to_level | Group ID of the last on/off button that was pressed |
ON | on | 108 |
OFF | off | 108 |
| Color Wheel | move_to_hue_and_saturation, followed by brightness_move_to_level | |
| Brightness Slider | brightness_move_to_level | Group ID of the last on/off button that was pressed |
| Color Temperature / Saturation Slider | Either move_to_hue_and_saturation or color_temperature_move (depending on an internal state of the device), followed by brightness_move_to_level. The move_to_hue_and_saturation state can be forced by touching the color wheel or by pressing one of the R, G, B buttons first. color_temperature_move can be forced by pressing the W button first. | Group ID of the last on/off button that was pressed |
10S / 30S Delay OFF | off after a delay of 10 / 30 seconds | Group ID of the last on/off button that was pressed |
Device Configuration
Exposing Control Values
By default, the hue/saturation/level values from the remote's controls are not exposed. To make these controls visible, enable the device-specific expose_values option.
This option exposes four additional values representing the most recently requested settings:
level: brightness levelcolor_temperature: color temperaturehue: color huesaturation: color saturation
(Note: If these exposed values don't appear immediately, a restart of Zigbee2MQTT may be necessary for the changes to take effect)
Zone-aware Actions
The device sends identical on / off / move_to_hue_and_saturation / brightness_move_to_level / color_temperature_move actions across all zones by default, with the zone's group ID only accessible in the device state. To enable sending of distinct actions for each zone, activate the device-specific zone_actions option.
When enabled, each action includes its corresponding zone ID:
on_zone_1,on_zone_2, ...off_zone_1,off_zone_2, ...move_to_hue_and_saturation_zone_1,move_to_hue_and_saturation_zone_2, ...- ...
Changing Group IDs
The remote is configured to use group IDs 101-107 for the seven on/off button pairs and group ID 108 for the master ON/OFF buttons by default. As a result, all FUT089Z devices on your network will control the same lights unless configured otherwise. To customize this behavior or resolve conflicts with existing group IDs, you can override the default assignments by configuring the device-specific zone_[0-8]_group_id option with your preferred ID.
To apply the new group ID settings to the device, press any button after making the changes.
Controlling Lights and Switches
Home Assistant Automations
By default, it is neither possible to use Home Assistant device triggers nor state triggers. This is due to the non-standard way the remote communicates. However, it is possible to use an mqtt trigger to react on any message from the device, parse the payload and decide what to do inside Home Assistant.
Below is an example with full functionality to control kitchen_light with button 4 of MiBoxerRemote1:
triggers:
  - topic: zigbee2mqtt/MiBoxerRemote1
    trigger: mqtt
conditions: []
actions:
  - variables:
      mylight: light.kitchen_light
      group: 104
  - if:
      - condition: template
        value_template: "{{ trigger.payload_json.action_group | int(0) == group | int(0) }}"
    then:
      - if:
          - condition: template
            value_template: "{{ trigger.payload_json.action.startswith('move_to_hue_and_saturation') }}"
        then:
          - action: light.turn_on
            data:
              hs_color:
                - "{{ trigger.payload_json.action_hue*360/254 }}"
                - "{{ (trigger.payload_json.action_saturation-170)/84*100 }}"
            target:
              entity_id: "{{ mylight }}"
      - if:
          - condition: template
            value_template: "{{ trigger.payload_json.action.startswith('brightness_move_to_level') }}"
        then:
          - action: light.turn_on
            data:
              brightness: "{{ trigger.payload_json.action_level }}"
            target:
              entity_id: "{{ mylight }}"
      - if:
          - condition: template
            value_template: "{{ trigger.payload_json.action.startswith('color_temperature_move') }}"
        then:
          - action: light.turn_on
            data:
              color_temp: "{{ trigger.payload_json.action_color_temperature }}"
            target:
              entity_id: "{{ mylight }}"
      - if:
          - condition: template
            value_template: "{{ trigger.payload_json.action.startswith('on') }}"
        then:
          - action: light.turn_on
            target:
              entity_id: "{{ mylight }}"
      - if:
          - condition: template
            value_template: "{{ trigger.payload_json.action.startswith('off') }}"
        then:
          - action: light.turn_off
            target:
              entity_id: "{{ mylight }}"
mode: single
If you enable both the expose_values and zone_actions options, you can also use device and state triggers for your automations (which you can easily create automatically by going to the Device in Home Assistant and adding an Automation from there):
On/off button:
alias: MiBoxerRemote1_Button_Zone_8_On
description: ""
triggers:
  - trigger: device
    domain: mqtt
    device_id: 37c0de12e46bb817b3ed5dcae834feee
    type: action
    subtype: on_zone_8
condition: []
action:
  - service: light.turn_on
    data: {}
    target:
      device_id: 0887f3aa92fa71265fcb5f1d7021c2a7
mode: restart
Brightness slider:
alias: MiBoxerRemote1_BrightnessSlider
description: ""
triggers:
  - trigger: device
    domain: mqtt
    device_id: 37c0de12e46bb817b3ed5dcae834feee
    type: action
    subtype: brightness_move_to_level_zone_3
condition: []
action:
  - service: light.turn_on
    data:
      brightness: |
        {{ states("sensor.miboxerremote1_level") }}
      transition: 0.2
    target:
      device_id: 8984f2bd0c64baa8badb3fe895f7dd95
    enabled: true
mode: restart
Direct Control via Zigbee Groups
Alternatively, or in addition to the approach described above, you can also directly control Zigbee lights etc. with this remote.
To directly control lights or smartplugs without going through MQTT (and Home Assistant or whatever),
- first create a Zigbee group with the correct ID (10X),
- name it like you wish,
- then add the devices you intend to control to that group (pay attention to use the right termination point). Very important: do NOT add the remote itself to the group.
The ON and OFF Master Buttons on top of the remote control an extra zone with Group ID 108. You can for instance use it as a master switch or for just another light/smartplug etc...
The beauty of this approach is that the remote will work even with Zigbee2MQTT down, ... even better without any alive Zigbee controller.
It looks like a perfect emergency backup.
Technical Notes
- The saturation / color temperature slider control exhibits behavior which is not yet fully understood. The slider alternates between sending saturation and color temperature values based on an internal state of the device. You can force "saturation mode" by pressing any
R,G,Bbutton or touching the color wheel, while pressing theWbutton forces "color temperature mode". When pressing any on/off button, the slider reverts to its default behavior (either saturation or color temperature mode). The mechanism for changing this default behavior remains unknown. - As with most battery-powered devices, this remote does not continuously listen for Zigbee commands after its initial configuration. When sending commands to the device (such as Leave, Configure, or group ID changes), you should press any button afterward to ensure the command is received.
- The remote does not support light output cluster binding or manual group joining (it relies solely on its internal zone/group mapping).
Touchlink
The remote supports Touchlink. It is unclear how the Touchlink configuration interacts with the regular group configuration so if you intend to use Touchlink it would probably best not to pair it to a network.
Options
How to use device type specific configuration
zone_1_group_id: Group ID for zone 1 (default: 101). The value must be a number with a minimum value of1and with a maximum value of65535zone_2_group_id: Group ID for zone 2 (default: 102). The value must be a number with a minimum value of1and with a maximum value of65535zone_3_group_id: Group ID for zone 3 (default: 103). The value must be a number with a minimum value of1and with a maximum value of65535zone_4_group_id: Group ID for zone 4 (default: 104). The value must be a number with a minimum value of1and with a maximum value of65535zone_5_group_id: Group ID for zone 5 (default: 105). The value must be a number with a minimum value of1and with a maximum value of65535zone_6_group_id: Group ID for zone 6 (default: 106). The value must be a number with a minimum value of1and with a maximum value of65535zone_7_group_id: Group ID for zone 7 (default: 107). The value must be a number with a minimum value of1and with a maximum value of65535zone_8_group_id: Group ID for zone 8 (default: 108). The value must be a number with a minimum value of1and with a maximum value of65535expose_values: Expose additional numeric values for action properties (hue, saturation, level, etc.). The value must betrueorfalsezone_actions: Publish zone-specific actions with zone IDs (e.g., on_zone_1, off_zone_2). The value must betrueorfalse
Exposes
Battery (numeric)
Remaining battery in %, can take up to 24 hours before reported. Value can be found in the published state on the battery property. It's not possible to read (/get) or write (/set) this value. The minimal value is 0 and the maximum value is 100. The unit of this value is %.
Voltage (numeric)
Voltage of the battery in millivolts. Value can be found in the published state on the voltage property. It's not possible to read (/get) or write (/set) this value. The unit of this value is mV.
Action (enum)
Triggered action (e.g. a button click). Value can be found in the published state on the action property. It's not possible to read (/get) or write (/set) this value. The possible values are: on, off, brightness_move_to_level, color_temperature_move, move_to_hue_and_saturation.