SONOFF ZBDongle-E
| Model | ZBDongle-E |
| Vendor | SONOFF |
| Description | Sonoff Zigbee 3.0 USB Dongle Plus (EFR32MG21) with router firmware |
| Exposes | light_indicator_level |
| Picture | 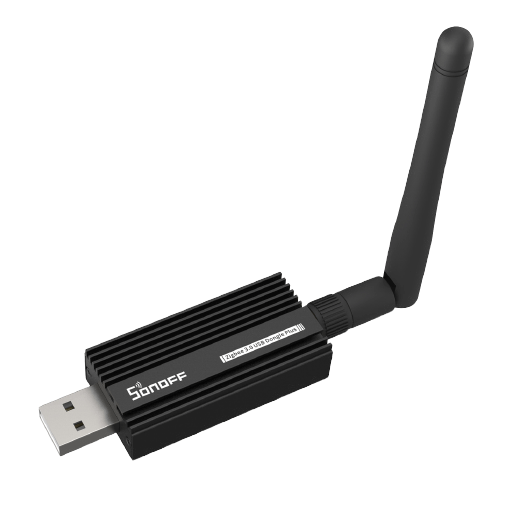 |
Notes
How to create a SONOFF ZBDongle-E Router
You can create a powerful Zigbee router from an ordinary Sonoff Zigbee 3.0 USB Dongle Plus (Model "ZBDongle-E" with EFR32MG21 chip) by flashing a router firmware onto the device. You can find the official guide for flashing the device here: SONOFF Zigbee 3.0 USB dongle plus firmware flashing. The guide also contains the link to the official SONOFF Router Firmware for the ZBDongle-E. The simple way is to use Itead web flasher https://dongle.sonoff.tech/sonoff-dongle-flasher/ and select lastest Zigbee Router from it; at the end of flashing operation (red and green lights will be powered on fixed mode), you can pair it to your Zigbee Coordinator!
As an alternative to disassembling the device, you can also use the browser-based Silabs Firmware Flasher. Before flashing, download the router firmware and plug the dongle into a USB port on your computer. A browser supporting the WebSerial API is required; if in doubt, use Google Chrome or Microsoft Edge. After the flashing is done, the dongle will immediately reboot into pairing mode. Pair as usual with Z2M.
Hints
The guide from SONOFF is not very detailed. Here are some additional hints:
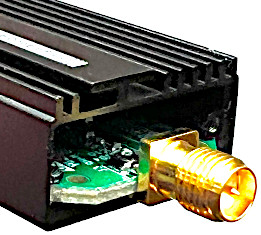
- First, you have to disassemble the device and pull the logic board out of its housing. You need a J00 Phillips screwdriver for this.
- Second, you need a software supporting the XMODEM file transfer protocol for sending the firmware image to the device. On Debian Linux like Ubuntu you can use lrzsz,
install XMODEM transfer protocol and terminal emulator Putty with
- debian based OS:
sudo apt install lrzsz putty - arch based OS:
sudo paxman -S lrzsz putty
- debian based OS:
user needs to be in dialout group in order to access serial ports
- debian based OS:
sudo adduser $USER dialout - arch based OS:
sudo usermod -a -G uucp $USER
- debian based OS:
log in and out so that group membership comes into effect (You can check by running
id)
- Third, plug in the device. You must operate on the naked logic board while it is plugged in. This is a lot easier if you use a USB extension cable.
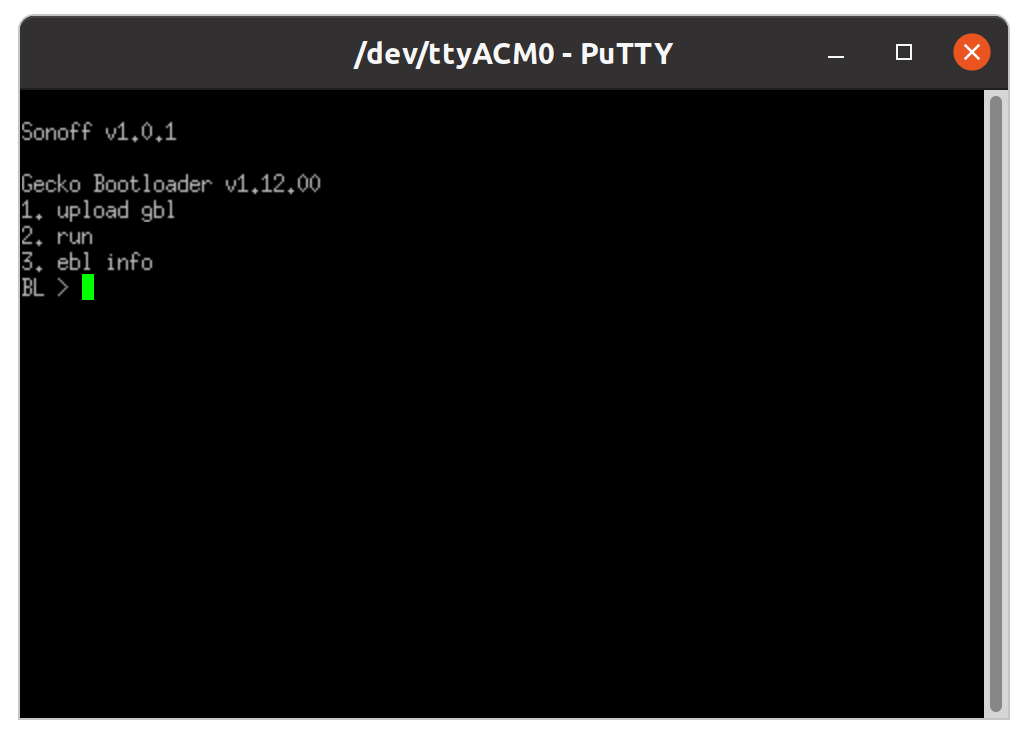
- Fourth, to enter the Bootloader Mode, you have to
Plug the device in
Connect to the device with the serial software (for serial connection parameters, see guide)
putty -serial -sercfg 115200,8,n,1 /dev/ttyACM0If you get the error
PuTTY: unable to load font "server:fixed", runexport GDK_BACKEND=x11previous to the putty command.Press and hold the "BOOT" button (see image below)
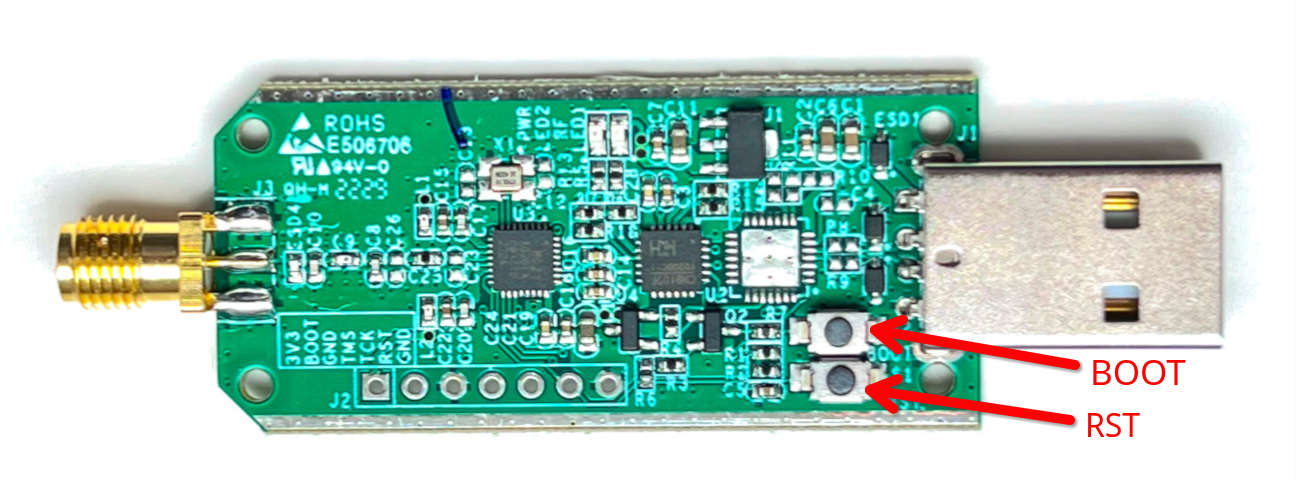
While holding the "BOOT" button press the "RST" button once to restart the device. You should see the output below. Release the "BOOT" button.
- Fifth, to upload the file
In the bootloader terminal press '1' to initiate the upload
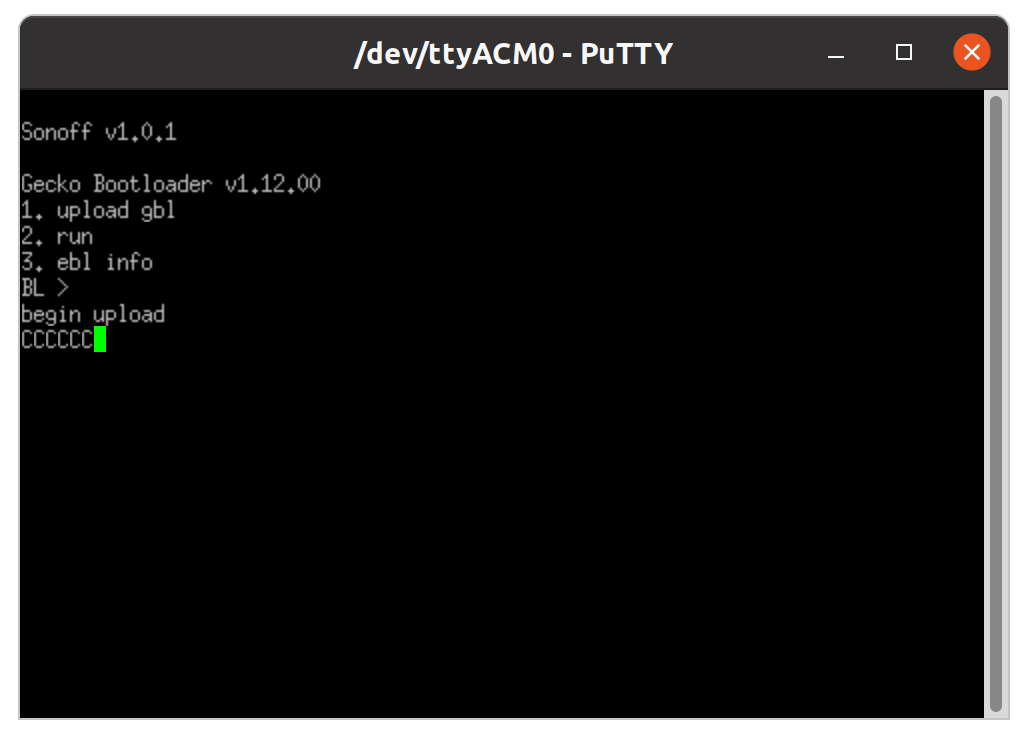
Open another terminal on the host system. Download the router firmware *.gbl file from github.com/darkxst/silabs-firmware-builder, e.g.
wget https://github.com/darkxst/silabs-firmware-builder/releases/download/20250627/zbdonglee_zigbee_ncp_8.0.3.0_sw_flow_115200.gblSend the file through XMODEM
- debian based OS:
sx zbdonglee_zigbee_ncp_8.0.3.0_sw_flow_115200.gbl < /dev/ttyACM0 > /dev/ttyACM0 - arch based OS:
lrzsz-sx -X zbdonglee_zigbee_ncp_8.0.3.0_sw_flow_115200.gbl < /dev/ttyACM0 > /dev/ttyACM0(Without the -X it will not use the xmodem protocol)
- debian based OS:
Wait for 'Serial upload complete', then press '2' in the Bootloader Terminal to restart the dongle.
- Finally, the dongle LED blinks green, indicating it is in paring mode. Pair as usual with Z2M.
- Note: The dongle may not pair successfully if it is plugged into a USB 3.x socket, if it fails to pair try moving it to a USB 2 socket or a standalone USB charger.
- If you have to re-pair the dongle and it does not show up you can try this step by step guide:
- Disassemble the device
- Re-attach the antenna (to avoid burnout)
- Provide power to the device
- Permit join (allow pairing) to Zigbee2MQTT Coordinator
- Press the boot button for about 5 seconds (green LED might not flash)
- Monitor device becoming available
- Power down device, remove antenna
- Re-assemble device and attach antenna
- Place router to it’s designed location
Exposes
Light indicator level (numeric)
Brightness of the indicator light. Value can be found in the published state on the light_indicator_level property. It's not possible to read (/get) or write (/set) this value.